As the title suggests “Fractalius” is a Redfield Photoshop plugin. This plug-in creates unusual eccentric artworks in a single step. The effects are based on extraction of so-called hidden fractal texture of an image. You can also simulate various types of exotic lighting’s and high realistic pencil sketches.
Now this plugin is quite easy to install and the end result is quite electrifying. Here’s a detailed tutorial
Make sure you have Adobe Photoshop installed. You can download this plugin from here, select Fractalius plug-in V1.75 (32/64) bit and download the executable file. This is a demo version with all functionality, except that you shall have the word “DEMO” printed all over the filtered image. If you like you an purchase the Pro-Edition.
Once downloaded, install this plugin and it does all the necessary setup.
 Step 1: Open you image in Photoshop in the normal way, you can now use the plugin. Make a Duplicate of the original image (hide this layer) and work on the new image. Go to the Filter menu, in the bottom drop-down list you will find Redfield, click on Fractalius Demo. The Redfield Plug-in dialog box is open, in the centre of the dialog box you have preview of the image and on the left side you have various setting. In the bottom left you have 2 Buttons, Green- To Apply and Red – To Cancel.
Now, let’s understand how the various setting effects the filtering:
Sharpness: Sharpness of the image; Line Width: The width of the fractal lines; Radius: The radius which line will affect; Diffusion: Gives or removes focus to image; Depth: Makes it darker or brighter
Brightness: Almost the same as Depth but they affect colors in different aspects; Saturation: affects the intensity of each color; Scale: The percentage of the image that is transformed by the algorithm
Besides the Green Button, there are few presets. You can even have a try on these, Once you are satisfied with the result, click on the Green Button to apply. Click on the Red Button to close or cancel the whole process.
 Step 2: Now Un-hide the original image layer. Click on Opacity and check on to get more detail of the image. Once done save the file and remember to save the Opacity back to 100%.
Please note you shall have the word “DEMO” on this new filtered image. There are ways to eliminate these words from the image using Photoshop skills.
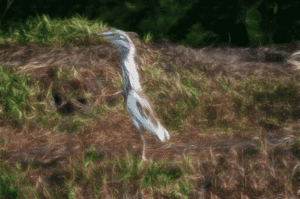
I’ve 2 images here to give you a preview of this plug-in effect. The original Cheetah image is taken from the net which is uploaded by Wolver, the second image is of the Egret which I’d taken some time back. In the Cheetah image I’ve applied various setting while in the Egret image I’ve applied the Impression 1 preset.
I’ve tried this with Photoshop CS3 on a 64 bit Windows 7 operating system. Feel free to be creative and you definitely shall enjoy the result.


